Wireless printers have ushered in a new age of convenience. With the click of a button, you can send a document to a printer a foot away, a room away, or even a full town away (as was the case with my former work printer).
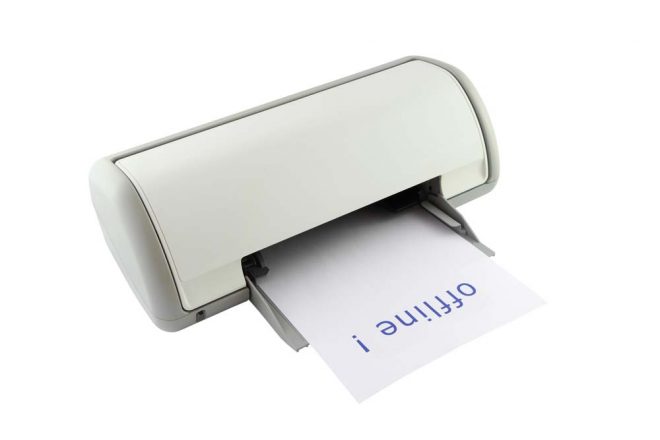
However, with the emergence of this new technology, we have also received new printer challenges we didn’t previously face. The most common: the offline printer.
If you have a wireless printer, you have undoubtedly encountered a situation in which your printer was on but was not registering as a viable printing option on your computer. Fortunately, this doesn’t mean that your printer is broken. When your printer is offline, it means that your printer cannot communicate with the device from which you are trying to print. Luckily, printers can typically be brought back online with a few simple steps.
This article will outline the steps you can take to get your printer back online and communicating with your computer.
Contents
Solutions for Getting a Printer Back Online
Turn on the Printer and Connect to WiFi
Once your printer is on, use the printer control panel to identify the WiFi. From the control panel, select the network settings function and press “Confirm Network Settings.” This will show you the current status of your printer’s internet connection. Make sure that your computer and printer are both connected to the same WiFi.
Physically Check Printer and Cables
Examine the printer for physical malfunctions that would prevent you from printing. Make sure the printer’s ink cartridges are properly installed and that the paper is fully inserted in the correct trays. You’ll also want to make sure that there are no paper jams or other obstructions.
Make sure that all cables are properly connected at both ends. Check that your power cord is properly connected and, if applicable, that the Ethernet cord is attached to an active Ethernet port. Try connecting cables to different sockets, or using different cables to ensure that they are not the source of the issue.
Restart Computer and Printer
As simplistic as it sounds, this is a tried and true solution. Restarting your printer and computer can help refresh the components necessary for the two to communicate.
When you restart your printer, turn your printer off, unplug the power cord, and let it sit for at least 30 seconds. Plug your printer back in and turn the printer back on. Make sure it is once again connected to the WiFi.
Cancel Current Print Jobs
If you have print jobs queued, it can sometimes overwhelm the printer and computer as they are trying to connect. Canceling print jobs allows the printer and computer to focus solely on communicating.
To cancel print jobs on Windows:
- Click on the “Start” button on your computer and select “Control Panel” from the list.
- In the window that appears, select “Devices and Printers” (or the equivalent menu option).
- Right-click on your printer’s icon and select “See What’s Printing.”
- Right-click each print job and select “Cancel.”
To cancel print jobs on MacOS:
- In the “Apple” menu, click “System Preferences” and select “Print & Scan.”
- Click on your printer and select “Open Print Queue.”
- Click on each print job and select “Cancel.”
Manually Set Printer Online
To manually set your printer online with Windows:
- Click on the “Start” button on your computer and select “Control Panel” from the list.
- In the window that appears, select “Devices and Printers” (or the equivalent menu option).
- Click on “Printer” on the top menu of the “Devices and Printers” window and select “Use Printer Online” in the drop-down menu.
To manually set your printer online with MacOS:
- In the “Apple” menu, click “System Preferences” and select “Print & Scan.”
- If a yellow light appears next to your printer’s name, double-click the icon for your printer. Click “Resume” from the window.
Manually Set Printer as the Default Printer
The default printer is the printer that your computer will prioritize when choosing a printing device. By making your printer the default printer selection, your computer will automatically stay connected to it.
To manually set your printer as the default printer with Windows:
- Click on the “Start” button on your computer and select “Control Panel” from the list.
- In the window that appears, select “Devices and Printers” (or the equivalent menu option).
- Select your printer from the resulting window, and then select “Open Queue.”
- Under the “printer” drop-down, select “Set as Default Printer.”
To manually set your printer as the default printer with MacOS:
- In the “Apple” menu, click “System Preferences” and select “Print & Scan.”
- Click “Default Printer,” then select your printer as the default printer option.
Remove and Reinstall Printer
The final solution requires you to remove the printer from your computer and then reinstall it. This will allow the connection between your computer and printer to once again start from scratch.
To remove and reinstall a printer with Windows:
- Click on the “Start” button on your computer and select “Control Panel” from the list.
- In the window that appears, select “Devices and Printers” (or the equivalent menu option).
- Right-click on your printer and select “Remove device.”
- To reinstall the printer, click “Add a Printer” on the “Devices and Printers” window and follow the prompts.
To remove and reinstall a printer with MacOS:
- In the “Apple” menu, click “System Preferences” and select “Print & Scan.”
- Right-click anywhere in the “Print & Scan” window and select “Reset Printing System.” This will clear any errors, print jobs, and printer preferences from your computer.
- Once the reset is complete, select “Add Printer or Scanner” and select your printer. Follow the subsequent prompts to reinstall your computer.
Additional Printer-Specific Solutions
In addition to these solutions, many printer companies provide printer-specific solutions for getting their printers back online. Some of the most common printer brands are identified and discussed below.
Getting a Canon Printer Back Online
Canon recommends the troubleshooting solutions discussed at the beginning of this article. If your printer is still offline after following these steps, search for printer-specific solutions or speak to a representative at the Canon Support Center.
Getting an HP Printer Back Online
Hewlett Packard (HP) provides free printer troubleshooting for Windows customers through their “HP Print and Scan Doctor” program. If the solutions above do not resolve your printer’s offline status, download the program, and follow the prompts:
To use the “HP Print and Scan Doctor” with Windows:
- Download the “HP Print and Scan Doctor” from your computer.
- Once the program downloads, open the downloaded application (called HPPSdr.exe) by allowing it to run.
- A window will appear. If asked if you trust the file, selected “Yes.” From the “HP Print and Scan Doctor” window, click “Start.”
- Choose your printer from the subsequent page. If your printer does not appear, restart your printer and select “Retry” on the “HP Print and Scan Doctor” window.
- Follow the prompts from the “HP Print and Scan Doctor.”
Unfortunately, there is not an “HP Print and Scan Doctor” for MacOS users at this time.
If you are still not able to get your printer online, it may be time for professional help. HP Printer Support is available 24/7 to assist with additional troubleshooting.
Getting an Epson Printer Back Online
Epson recommends the solutions listed above for returning a printer online. If your printer is still offline after following these troubleshooting solutions, visit the Epson Support Center for additional assistance.
Getting a Brother Printer Back Online
Brothers printers are a bit more unique. In certain situations, a copy of your printer may be created on your computer, which can then lead to your printer driver working incorrectly. A copy of your printer can be created when you connect the printer using a different USB port on your computer or if you have installed the same printer driver multiple times.
To solve this issue, you will need to remove the copies that are not working and set the remaining copy as your default printer:
To remove printer duplicates with Windows:
- Click on the “Start” button on your computer and select “Control Panel” from the list.
- In the window that appears, select “Devices and Printers” (or the equivalent menu option).
- Look through your available devices and see if there are multiple printers with the same name (For example, “Brother HL-6180DW series” and “Brother HL-6180DW series (copy 2)”)
- If there are multiple versions of your printer, hover your mouse over the first one until the printer status appears. If the printer status is “ready,” set this printer as your default option by right-clicking the icon and select “Set as Default Printer.”
- For the duplicates that are not working properly, it is best to remove them from your device to avoid similar problems in the future.
To remove printer duplicates with MacOS:
- In the “Apple” menu, click “System Preferences” and select “Print & Scan.”
- Look through your available devices and see if there are multiple printers with the same name (For example, “Brother HL-6180DW series” and “Brother HL-6180DW series (copy 2)”)
- If there are multiple versions of your printer, select the version with a green light next to it, indicating that it is online and available.
If you have a Brothers printer with a model name that begins with “MFC-“ or “DCP-,“ you can use the provided CD to run an automatic uninstallation and reinstallation of your printer. Insert the CD into your computer and select “Repair MFL-Pro Suite” from the CD options.
If problems with your Brother printer persist, Brother provides additional consultation on the Brother Support page.
For more useful printing techniques and tips, check out our homepage @ https://printertesting.com.


